Introduction to FreeCAD
Installation
First, make sure you have version 0.21 or higher. Versions lower than this import the .stp file as one entity, which is not what we want.
Debian packages are usually behind, so go to https://www.freecad.org/downloads.php and download the AppImage.
chmod +x FreeCAD-0.21.2-Linux-x86_64.AppImage./FreeCAD-0.21.2-Linux-x86_64.AppImage
Install Useful Add-ons
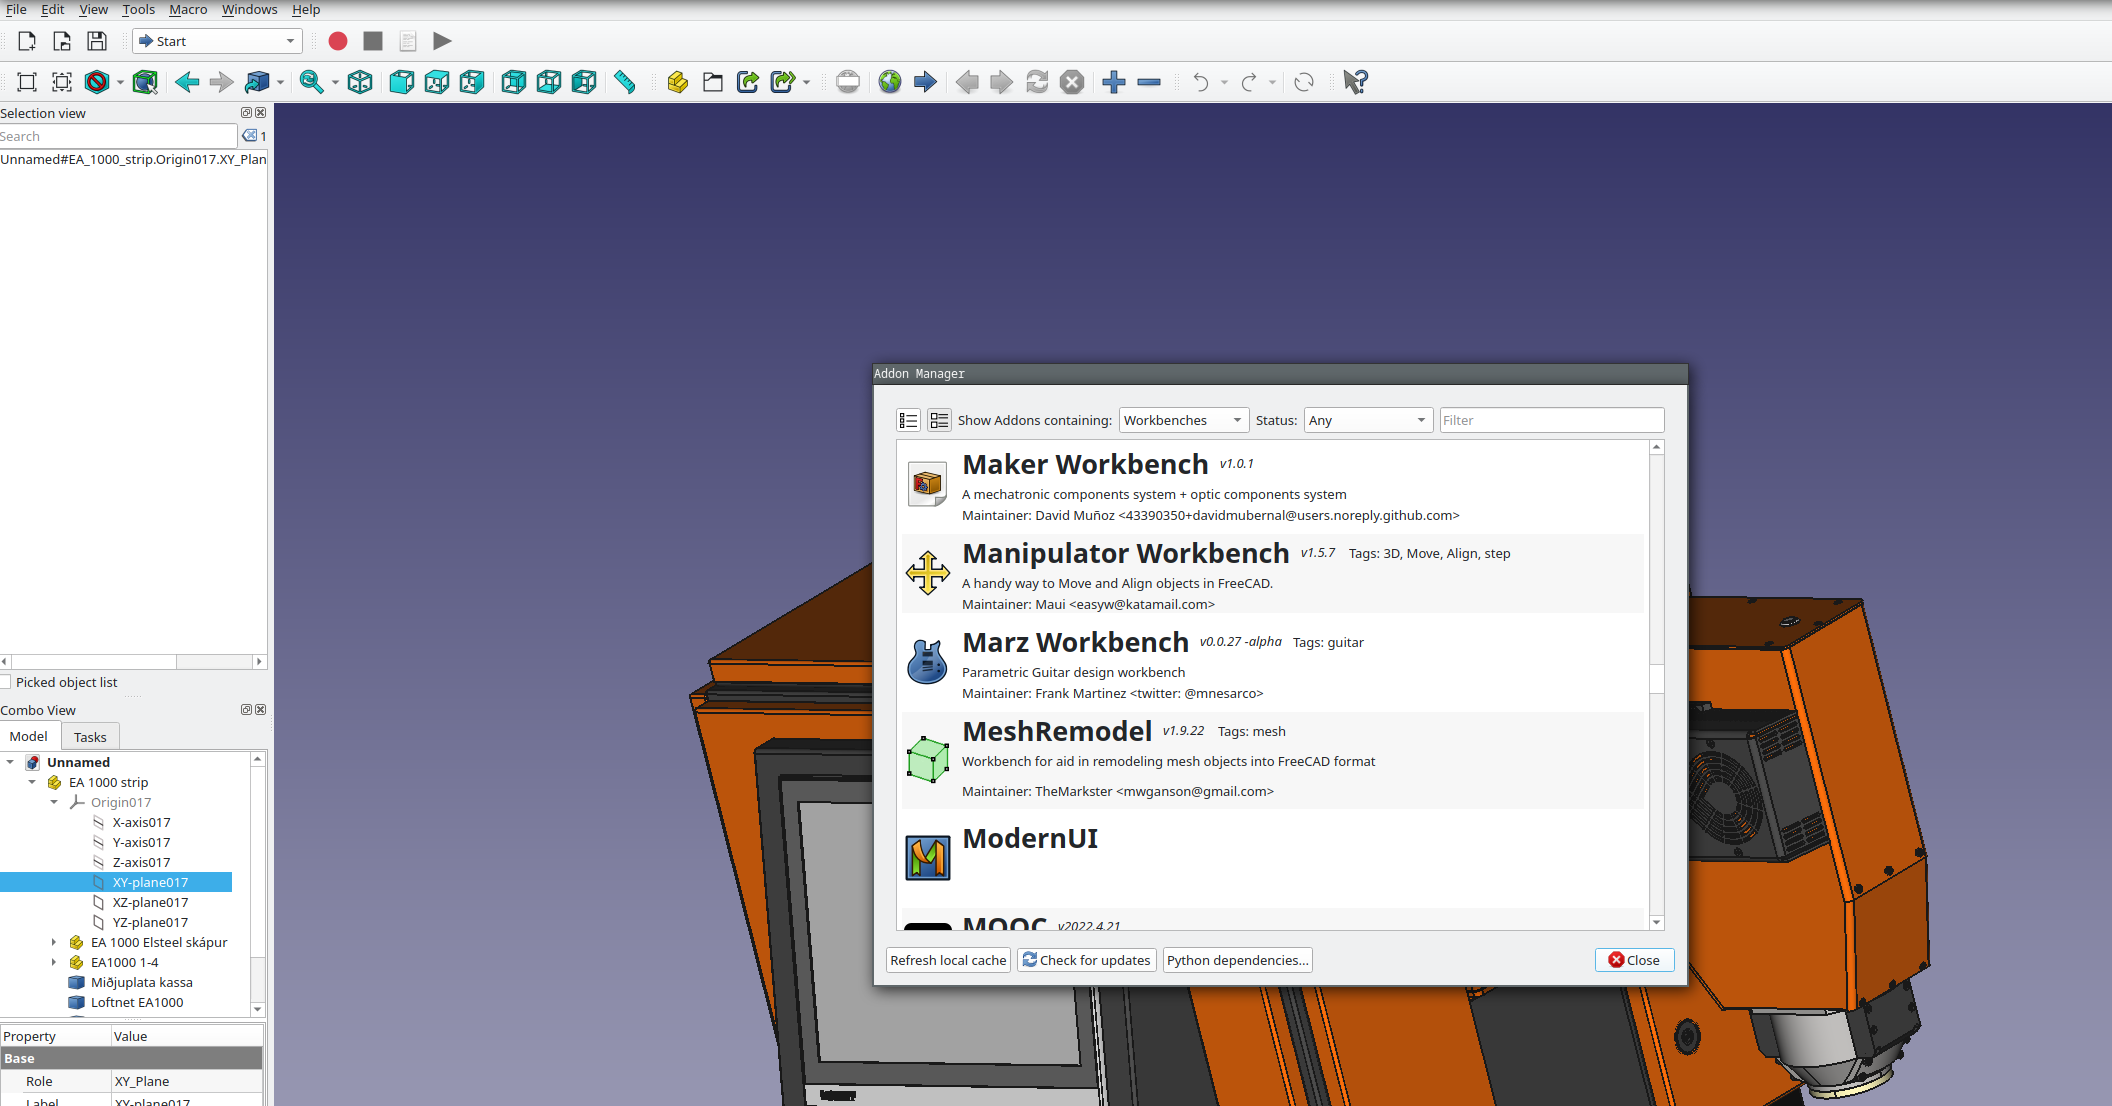
FreeCad provides some valuable add-ons. You can install them via the Addon Manager. (Tools>Addon manager). You should install the following Add-ons:
Manipulator Workbench Open Add-on Manager and select Workbenches. Then, search for the Manipulator Workbench and install it.
Viewing an object
If you get lost by “zooming” around the object or if the object is not directly visible after opening a file. You can easily fit the screen by clicking on the small cube under the “view” cube in the right upper corner of the object view and selecting Fit all (or using the shortcut, by pressing first V and immediately after F).
Orientation
If you select the isometric view
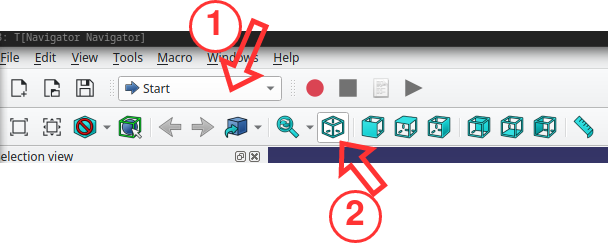
First, select start
Press isometric view
And the robot is not showing as expected, you can transform the model as following:
First set the navigation style to blender as this allows to rotate specific angles like 90°.
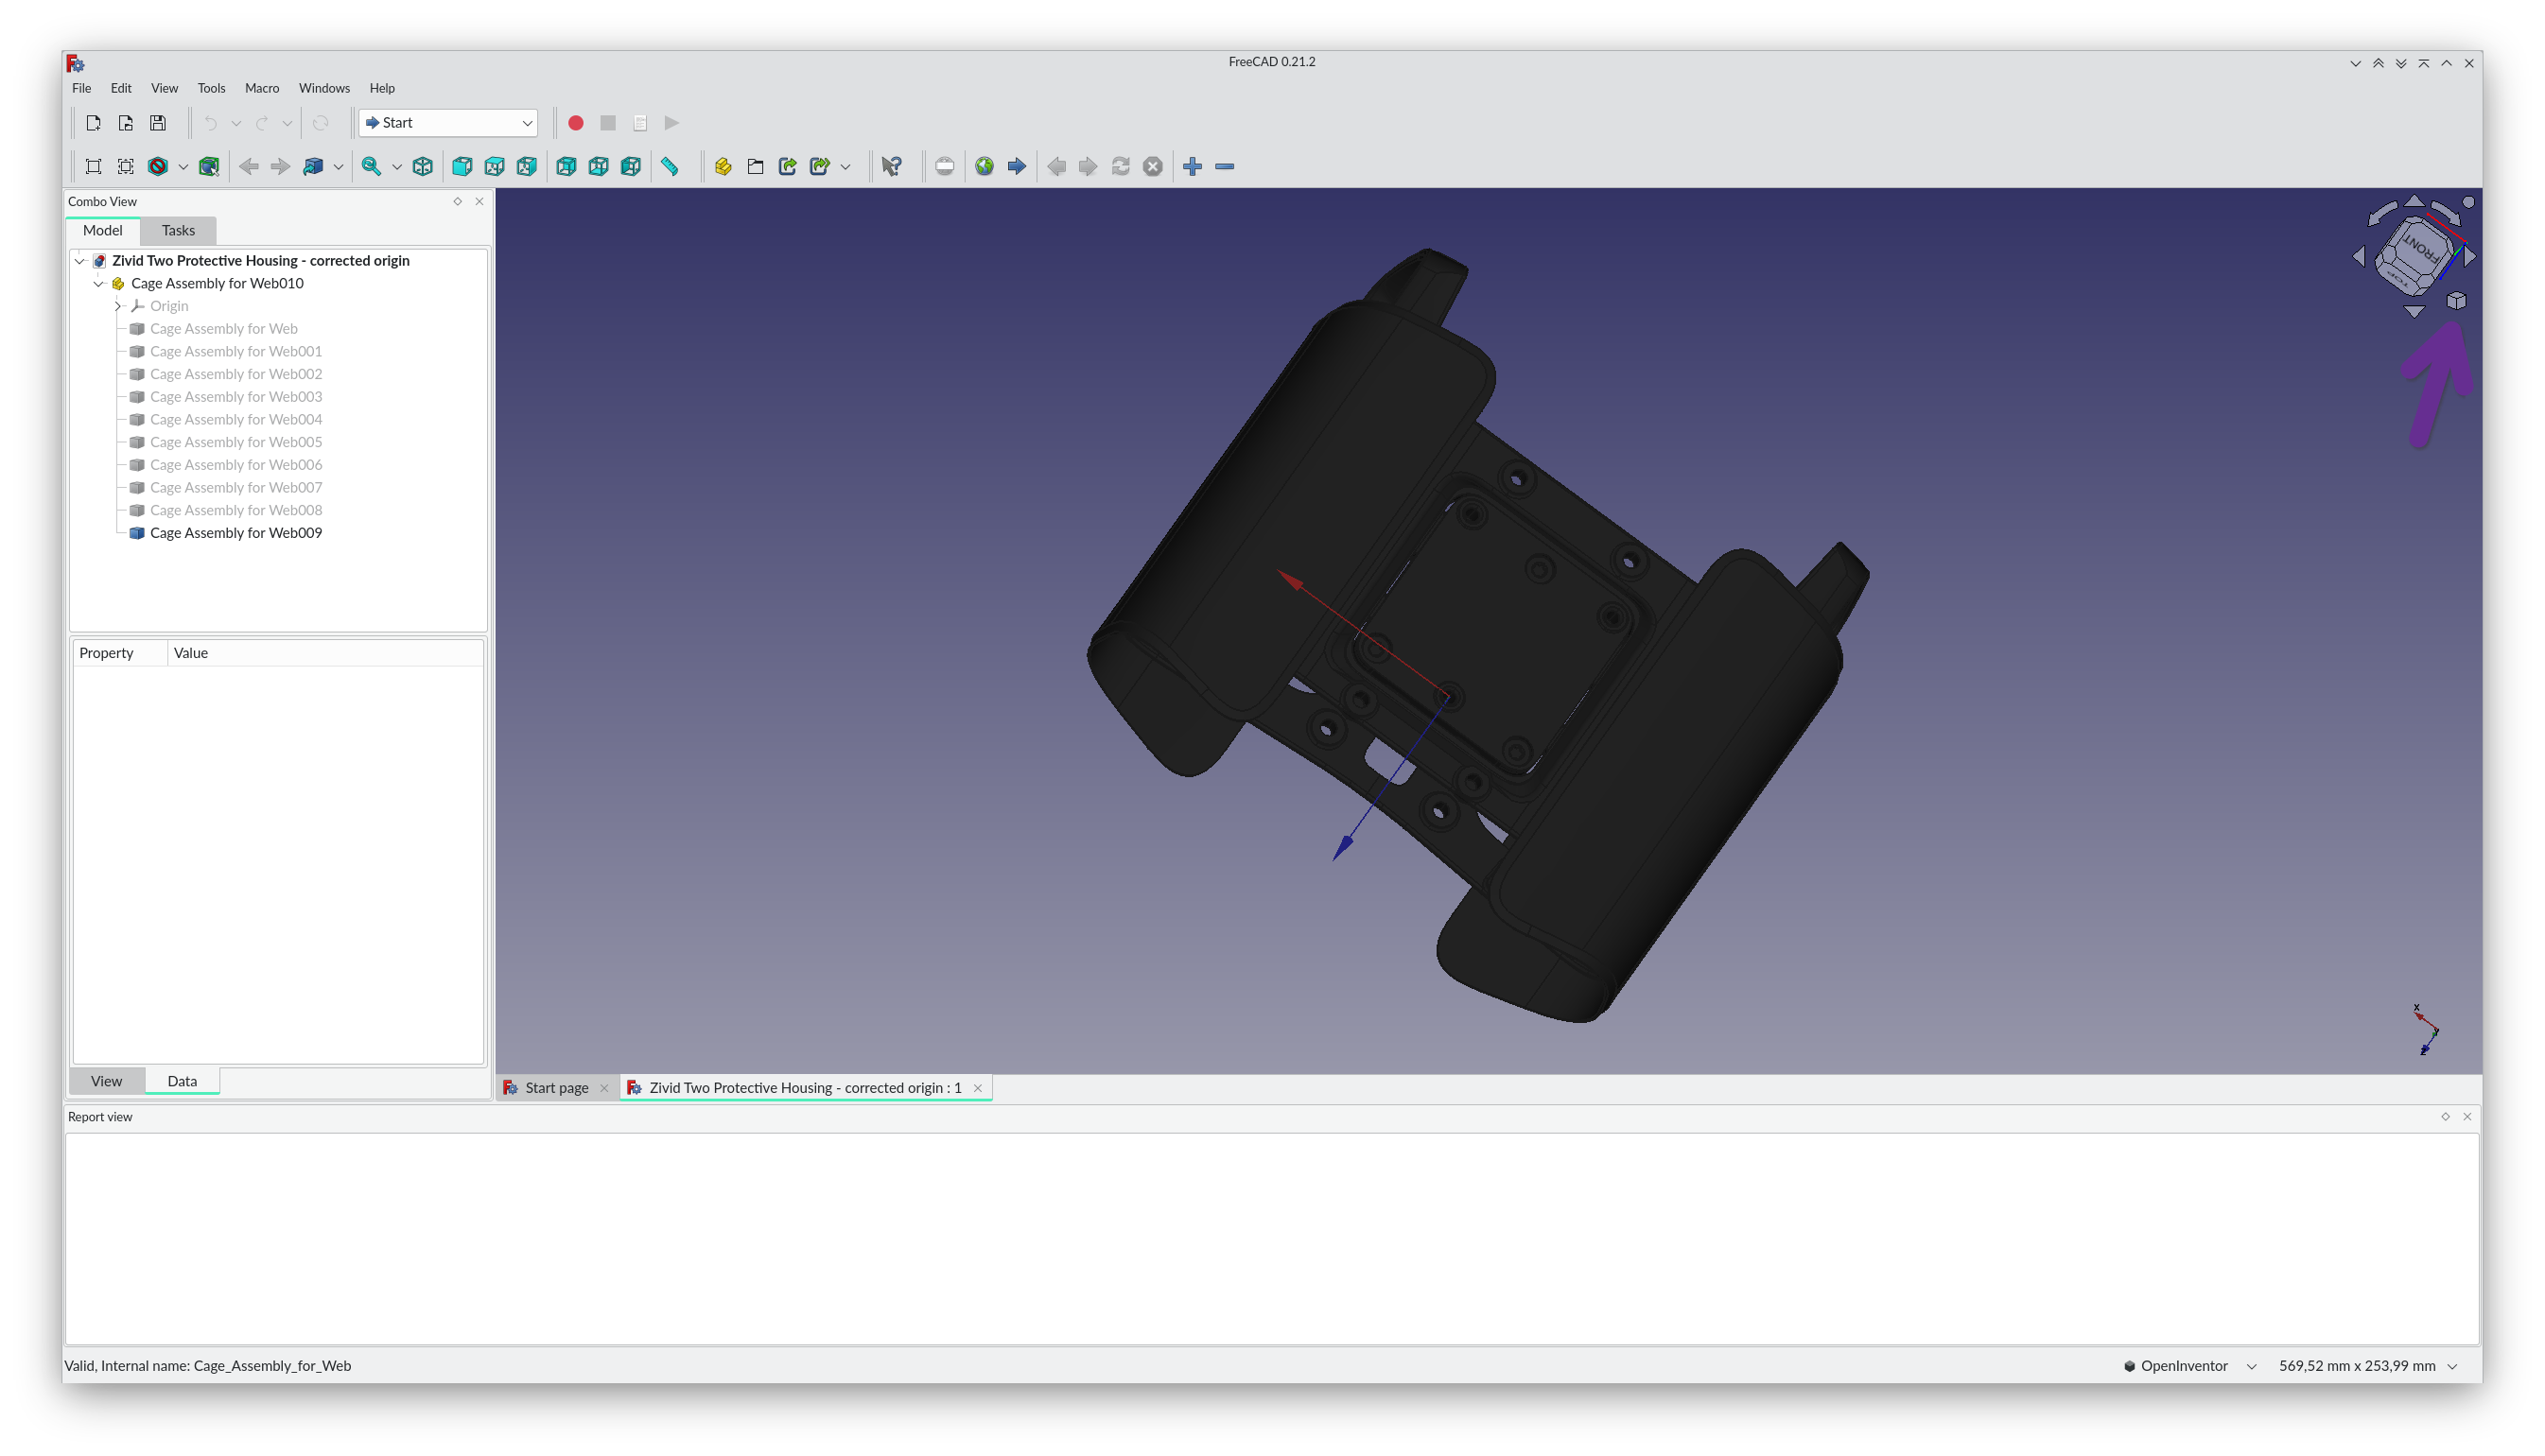
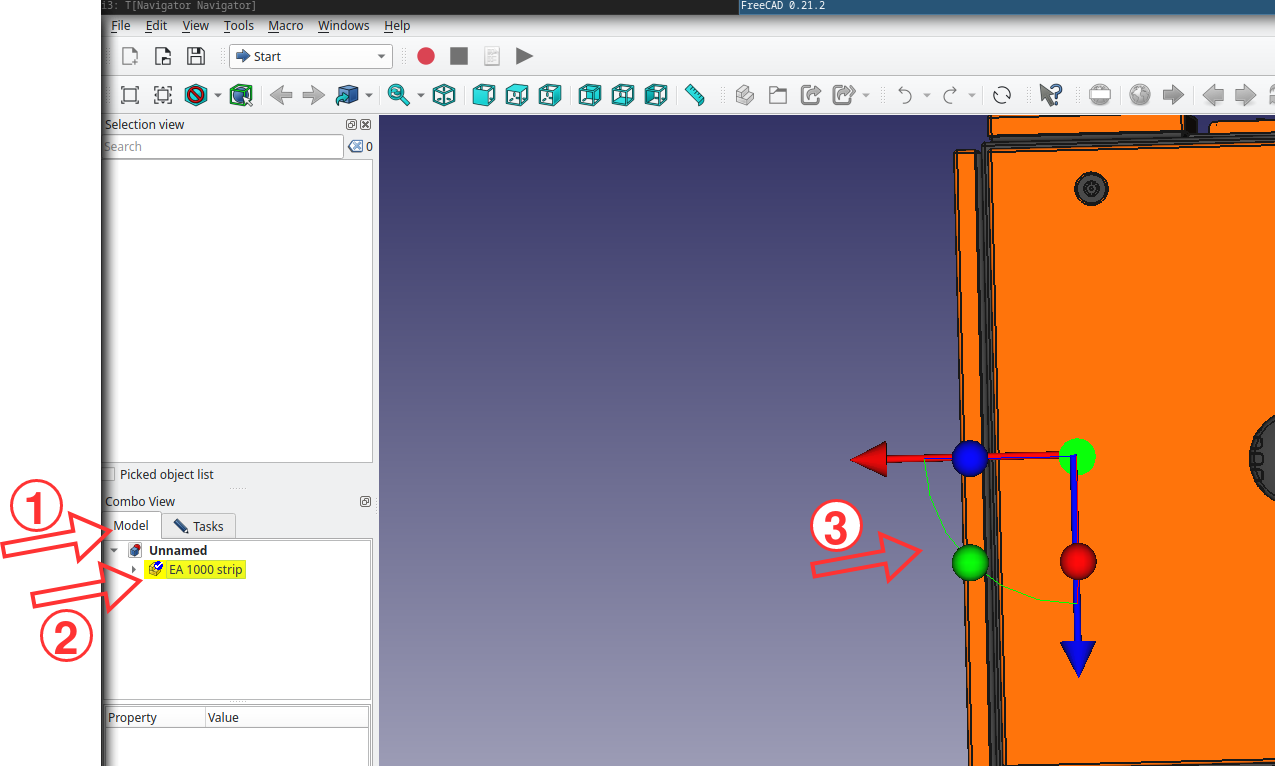
Select the model as shown
Right click and select transform
A coordinate system should pop up where you can rotate and translate.
Accept by pressing on ok in the task tab (right next to model in step one)
Measurements
There are different measurement tools for different measurement tasks. There are tools for linear measurement and circular.
Linear (closest point) measurements
Can be used to measure distance between two parallel lines/planes or the like.
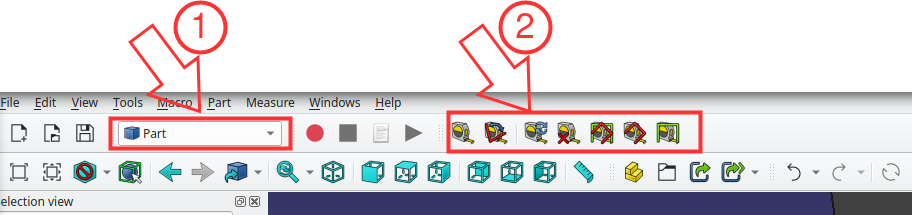
Select the part workbench
The toolbar should show some measure tape symbols. The most left one in the picture is for linear measurements. The next one for measuring angles.
Lines-Line, Line-Plane, Plane-Plane:
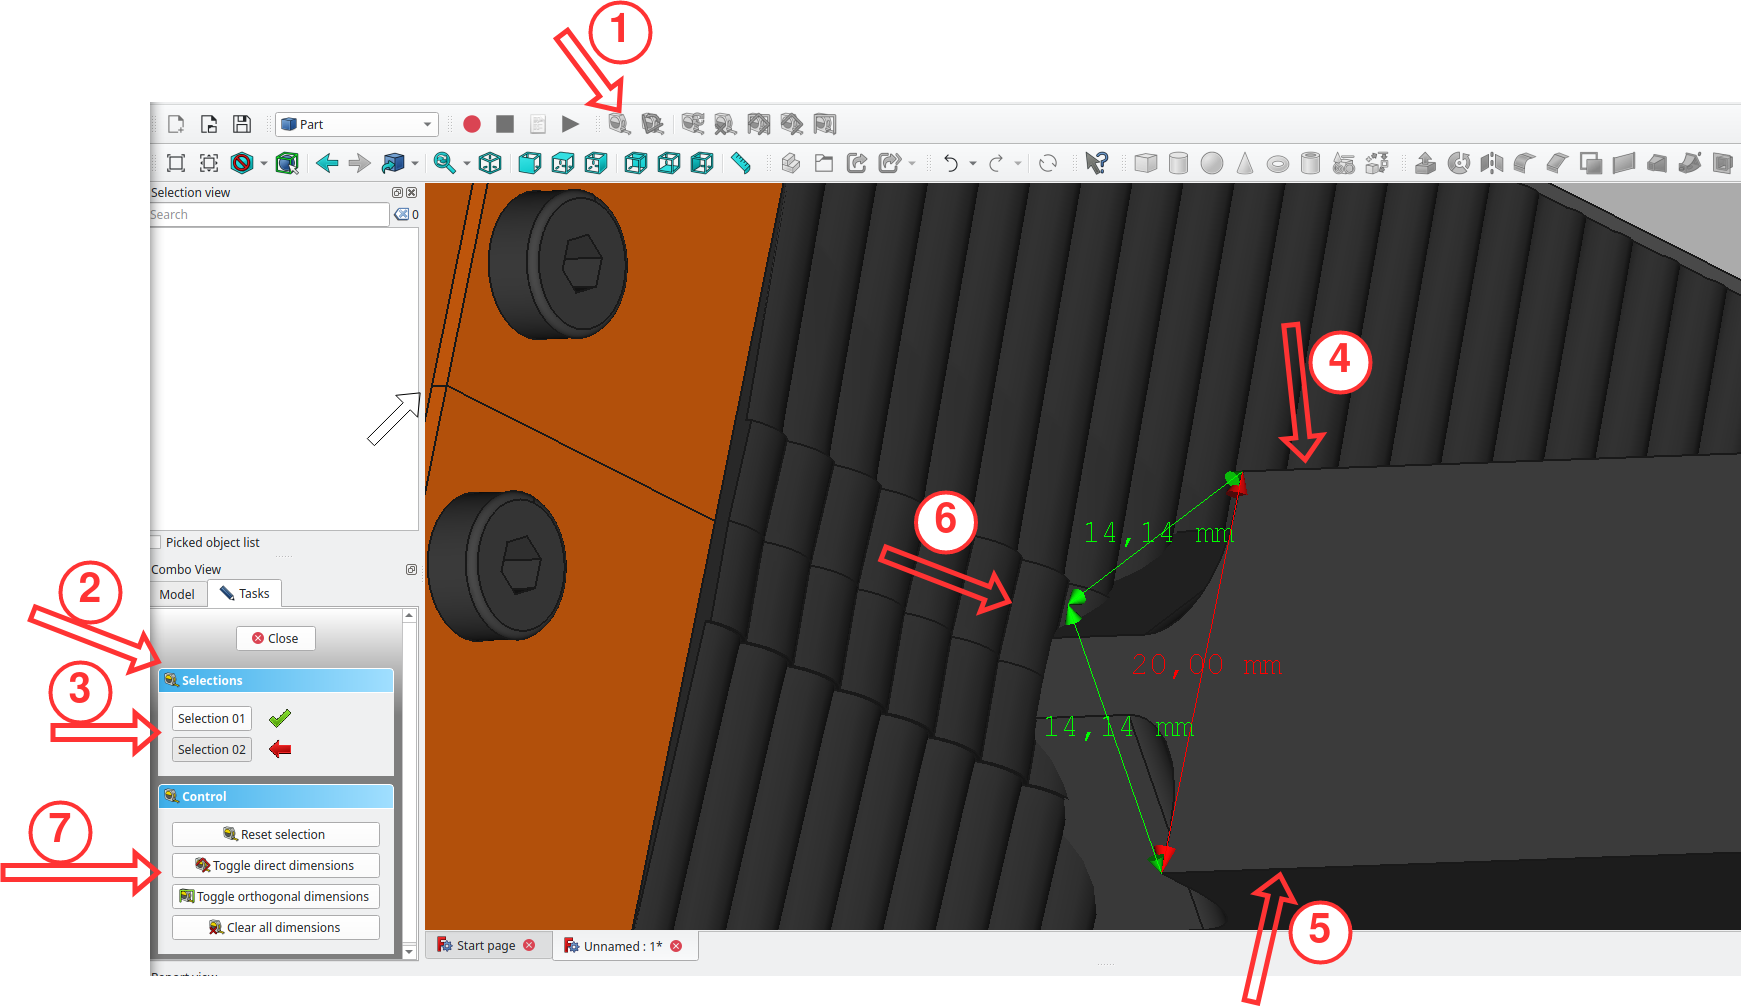
Select the measure tape symbol.
In the task tab a selection and control box will pop up. You can then select a line/plane by clicking on it (shift + left click if you are in OpenInventor navigation style)
The selection box shows you if your selection was successful
Select first line/edge
Select second line/edge
The measurement will pop up, showing you the distances
With the control box you can deselect/delete/clear measurements
Circles
Note
The Manipulator workbench add-on has to be installed.
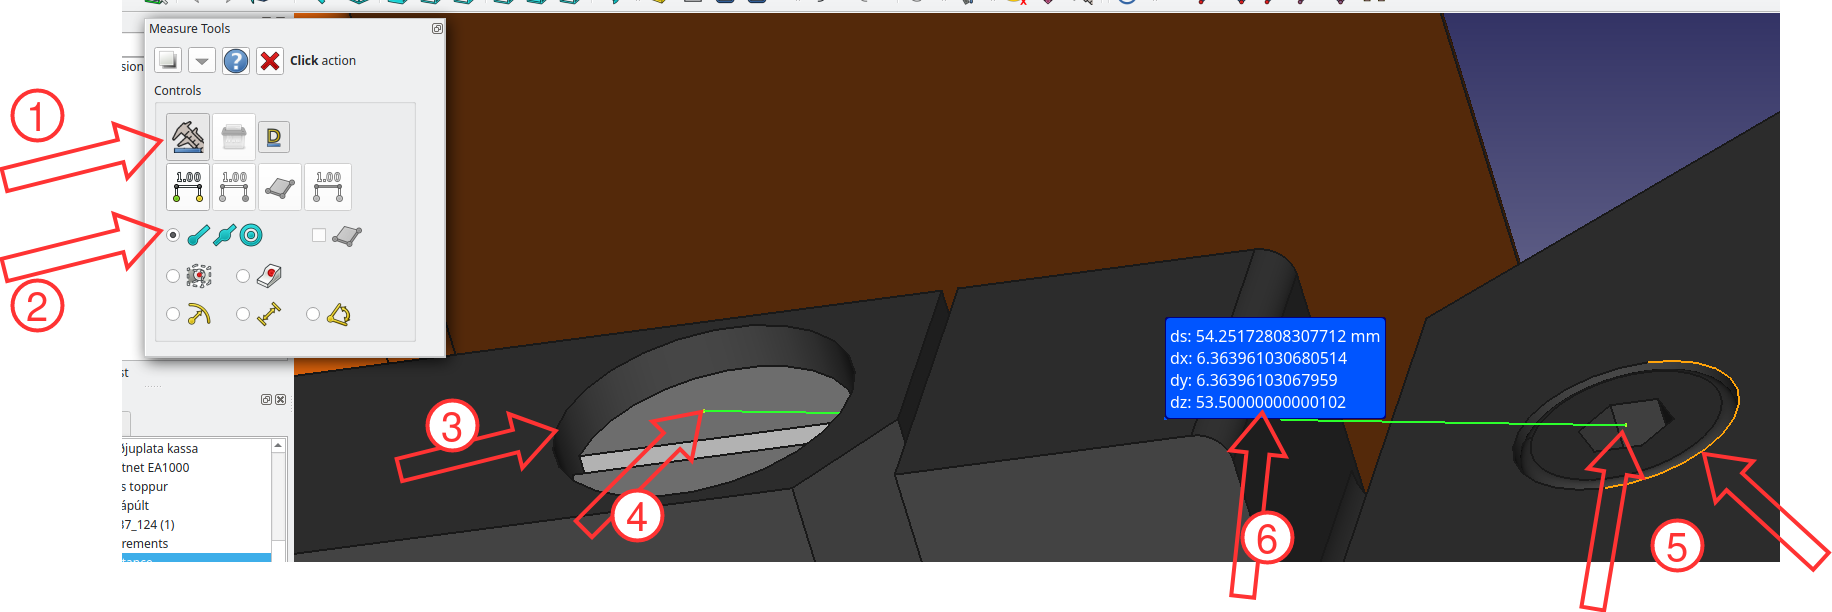
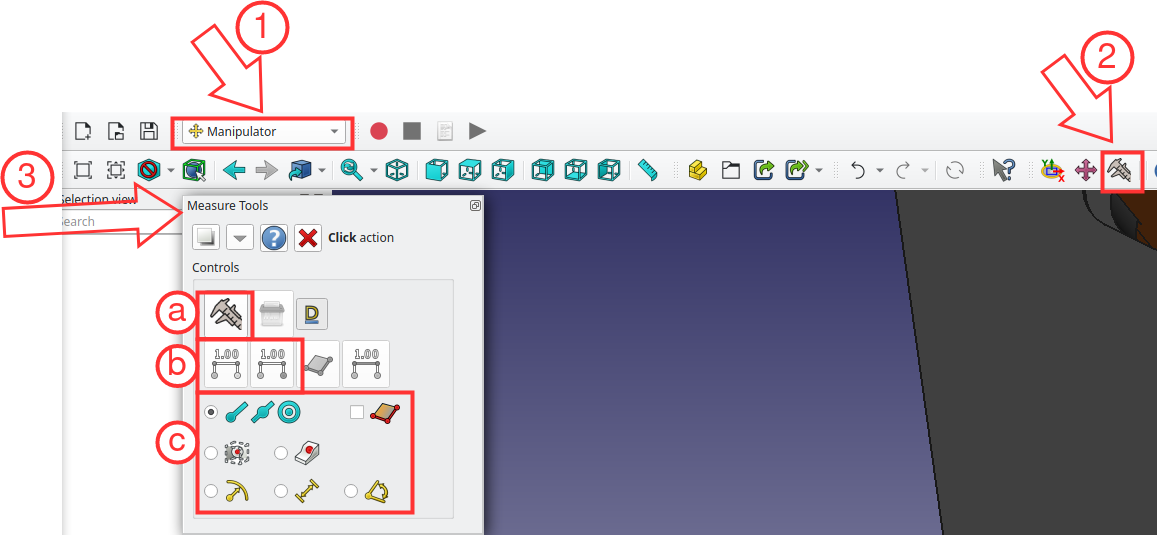
Select the Manipulator workbench.
Select the caliper
The measure toolbox will open:
The caliper symbol has to be clicked to take measurements
This shows if your selections were successful
You can select different meassurtypes. e.g. circle center, arcs, circles
The selected one (2 blue lines and blue circle with dot) can be used to measure the distance between circle-circle or circle-line/plane
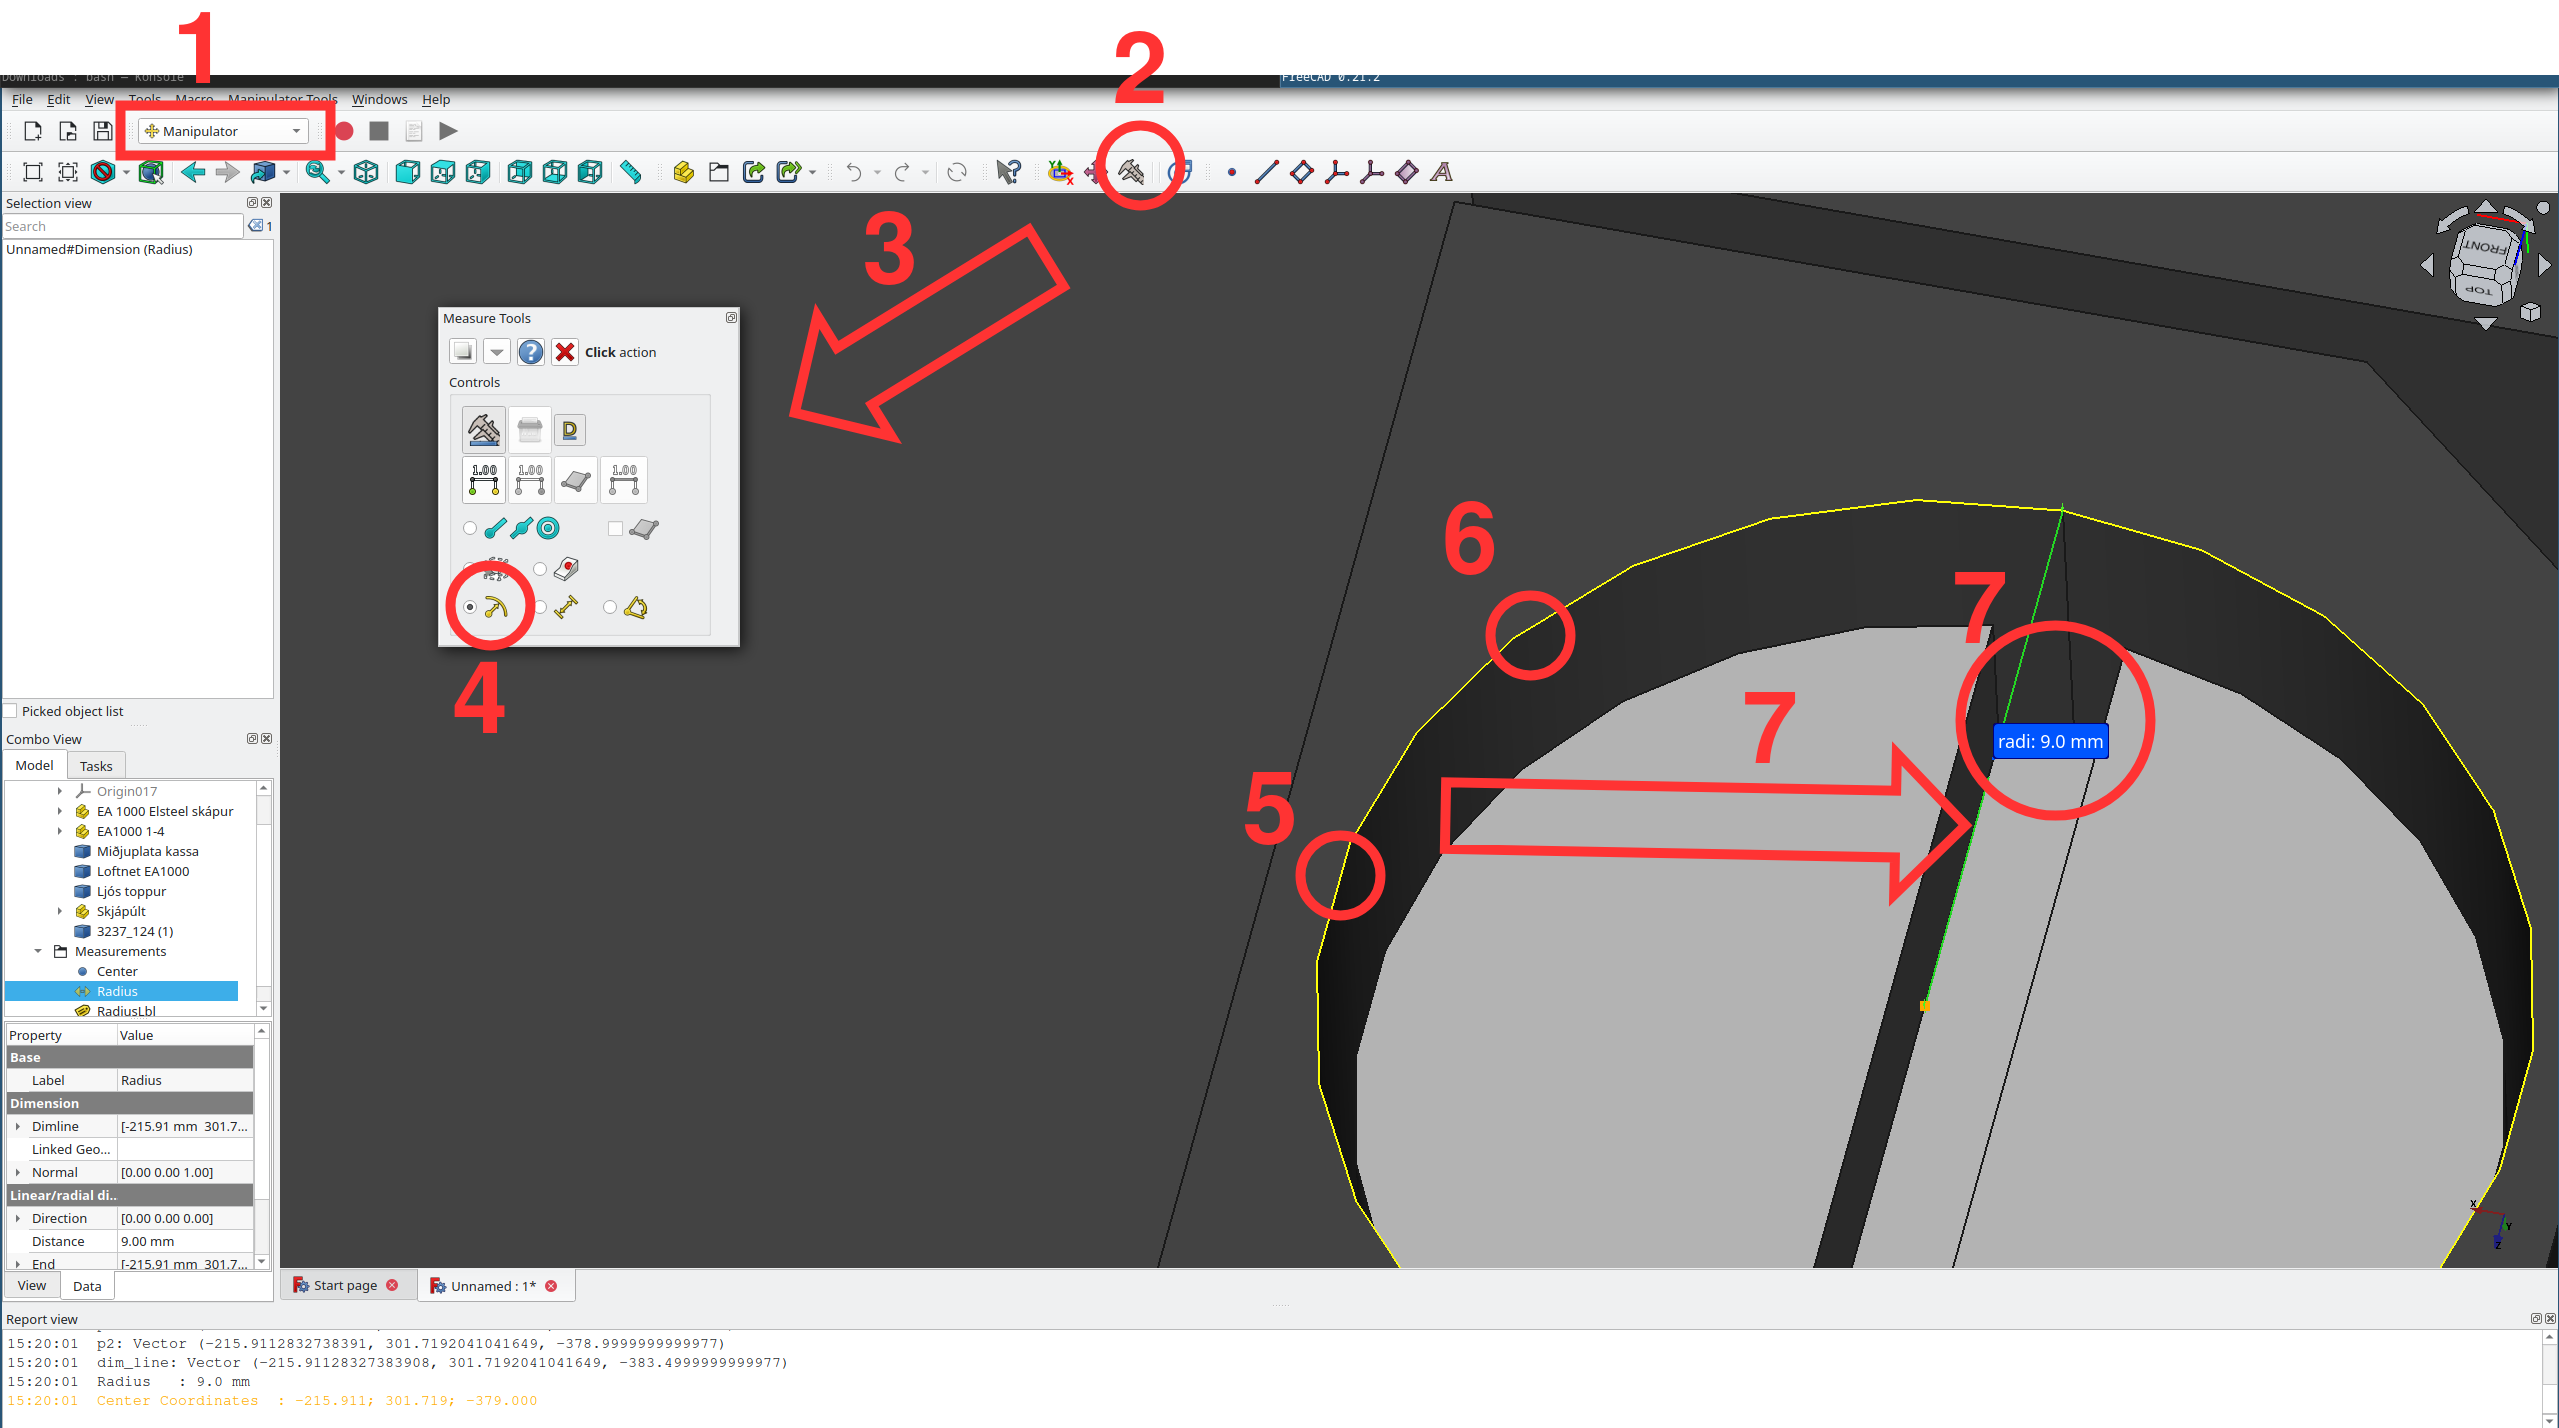
Radius:
First select the Manipulator workbench.
Select the Caliper Tool (press on the caliper symbol at the top)
This should open a small rectangular sub-window with different options like: measuring an ark or circle, get length of an edge, get angle…
Press on the Get radius or arc or circle option
Select an edge of a circular shape by pressing
ctrl+<left mouse>Repeat for second point
The calculated middle point and radius should now be visible in the screen
Circle-Line, Circle-Plane, Circle-Circle: